ES Index - S3 Snapshot & Restoration:

The question is. What brings you here? Fed up with all the searches on how to back-up and restore specific indices? 

Fear not, for your search quest ends here.!

After going through dozens of tiny gists and manual pages, here it is. We've done all the heavy lifting for you.


The following tutorial was tested on elasticsearch V5.4.0

And before we proceed, remember:

Do's:

Make sure that the elasticsearch version of the backed-up cluster/node <= Restoring Cluster's version.

Dont's:

Unless it's highly necessary;

        curl -X DELETE 'http://localhost:9200/nameOfTheIndex

              - deletes a specific index

Especially not, when you are drunk!:

        curl -X DELETE 'http://localhost:9200/_all

              - deletes all indexes (This is where the drunk part comes in..!!)


Step1: Install S3 plugin Support:

        sudo bin/elasticsearch-plugin install repository-s3
                                  (or)
        sudo /usr/share/elasticsearch/bin/elasticsearch-plugin install repository-s3

Depends on where your elasticsearch-plugin executable is installed. This enables the elasticsearch instance to communicate with the AWS S3 buckets.

Step2: Input the Snapshot registration settings:

METHOD: PUT

URL: http://localhost:9200/_snapshot/logs_backup?verify=false&pretty

PAYLOAD:
                {
                  "type": "s3",
                  "settings": {
                    "bucket": "WWWWWW",
                    "region": "us-east-1",
                    "access_key": "XXXXXX",
                    "secret_key": "YYYYYY"
                  }
                }


In the URL:
       - logs_backup: Name of the snapshot file

In the payload JSON:
        - bucket: "WWWWW" is where you enter the name of the bucket.
        - access_key & secret_key: The values "XXXXXX" and "YYYYYY" is where we key in the access key and secret key for the buckets based on the IAM policies - If you need any help to find it, here's a link which should guide you through (https://aws.amazon.com/blogs/security/wheres-my-secret-access-key/).
        - region: the region where the bucket is hosted (choose any from http://docs.aws.amazon.com/general/latest/gr/rande.html).

This should give a response as '{"acknowledged": "true"}'.

Step3: Cloud-Sync - list all Snapshots:

METHOD: GET 

URL: http://localhost:9200/_cat/snapshots/logs_backup?v


In the URL:
       - logs_backup: Name of the snapshot file
Time to sync up all the list of snapshots. If all our settings have been synced up just fine; we should end up with a list of indices, close to that of what is shown below:


Step4: Creating a Snapshot:

METHOD: PUT

URL: http://localhost:9200/_snapshot/logs_backup/type_of_the_backup?wait_for_completion=true

PAYLOAD:
            {
                "indices": "logstash-2017.11.21",
                "include_global_state": false,
                "compress": true,
                "encrypt": true
            }


In the URL:
       - logs_backup : Name of the snapshot file
       - type_of_the_backup : Could be any string
     
In the payload JSON:
        - indices: Correspond to the index which is to be backed-up to S3 bucket. In the case of multiple indices to back up under a single restoration point, the indices can be entered in the form of an array.
        - include_global_state: set to 'false' just to make sure there's cross-version compatibility. WARNING: If set to 'true', the index can be restored only to the ES of the source version.
        - compress: enables compression of the index meta files backed up to S3.
        - encrypt: In case if extra encryption on the indices is necessary.

This should give a response as '{"acknowledged": "true"}'

Step5: Restoring a Snapshot:

METHOD: PUT

URL: http://localhost:9200/_snapshot/name_of_the_backup/index_to_be_restored/_restore

PAYLOAD:
            {
                "ignore_unavailable": true,
                "include_global_state": false
            }

In the URL:
       - logs_backup: Name of the snapshot file
       - index_to_be_restored: Any of the index from the id listed in Step:3

In the payload JSON:
        - ignore_unavailable: It's safe to set this to true, to avoid unwanted checks.
        - include_global_state: set to 'false' just to make sure there's cross-version compatibility. WARNING: If set to 'true', the index can be restored only to the ES of the source version.

This should give a response as '{"acknowledged": "true"}'

Et Voila!  The restoration is complete.

And Don't forget to recycle the space corresponding to the index by safely deleting it - Reuse, Reduce & Recycle :)

Happy Wrangling!!!

Postgres to Mongo Migrator - Batteries Included!!!

DATABASE MIGRATION ACROSS PLATFORMS - Got your goosebumps yet?

     Well, long story short; cross-platform database migrations equals sleep talking, distress and long day works with coffee; and what good does it do? We will just end up writing hours and hours of scripts to conquer the end-result. However, It is of one-time-use-only, which lets you think to yourself; "All this horsepower and no room to gallop?".

Postgres to MongoDB:

    Be it a platform change, or maybe, it's due to the organizational growth or perhaps bad coding, or perhaps you have got your own microservices all set in, dwelling on the JSON objects; you might have had to switch from relational to noSQL databases. Switching can be tedious, I hear you and here lies the solution to all your worries.

Behold! Enter the Pg2Mongo:


 Pg2Mongo is an open source migration tool, written on pythonV3 which gives you an exclusive control over the migrations.

First Steps:

The initial step is to make sure you have access to both the Postgres and MongoDB servers. Upon cloning the repository, make sure you install the requirements for the pg2mongo to run.


For demonstration-sake, let's try to migrate the dataset provided along with the pg2mongo for us to play-around.

Configuration setup:

And now, all we got to do is to set up the instructions for the migrator to wrangle. The configuration file is at the location - 'pg2mongo/pg2mongo.yml' and it goes as follows:

The preliminary sections such as extraction and commit are self expanatory, stating the configuration settings for the extraction and commit databases. The component Migration is where all the magic happens!

The following section explains what the individual components are all about:

INIT_TABLE:

Inital table from which data needs to be migrated. This could be a prime table such as a transactions table with a primary key having multiple foreign constraints to other tables of the postgreSQL database. FOR EACH ENTRY IN THIS TABLE, THE LINKING OF OTHER TABLES WILL HAPPEN WHILE DEFINING THE TABLES.

INIT_KEYS:

KEYS of the init_table (aliases can be given using 'as')

SKELETON:

Skeleton is an empty raw python dictionary assignment which will transform to a mongodb document, upon migration

TABLES_ORDER:
 
The order by which the TABLES section needs to be executed for each of the entry from INIT_TABLE

TABLES:

Set of PostgreSQL tables enlisted along with condition and corresponding mapping. In the case of lists inside a dictionary, list can be mentioned. Mapping is where, the association of skeleton to the table keys is defined. The value assignments are python compatible; hence, they are defined by using '%s' and other python based variable transformation functions can be used over here.

COLLECTIONS:

This is where the push of the skeleton to the corresponding MongoDB collection takes place.
With all the instructions in place, it's time to wrangle. You may invoke the migration by keying in the following command.
And off she goes!!


Model Productionisation - MNIST Handwritten Digits Prediction


Yet another post about MNIST Handwritten Digits Prediction?

Nope. Not this time!!

There are about a hundred of tutorials available on-line for this cause.
Here's a quickie, to understand all the mechanics of the prediction process in tensorflow for the MNIST datasets which should get you, up and running.

Done with the basics? Head over to

https://github.com/datawrangl3r/mnistProduction

and clone the project.

We are about to deploy an image prediction RESTful API, powered by Flask microframework.

The code in the repo is written in pythonV2.7, you may also use python3; should be a breeze.


Step 2, mentioned above powers up the API, serving the end-point through the port 5000. Time to test-query our API.

The project directory contains the numerals_sample, from which one may crop the required digits out. As for this demo, we shall look at numba3.jpg, numba5.jpg, numba6.jpg, numba7.jpg and numba9.jpg present in the same directory, as that of the project.

Fire up the browser, and hit the following URL to test our model with a numba6.jpg:

http://localhost:5000/predictint?imageName=numba6.jpg


BAM..!!! I got a number 6!!


That was too easy.. How about - numba7.jpg


http://localhost:5000/predictint?imageName=numba7.jpg

BooM..!!!  7, It is...


How about, a numba9.jpg?


http://localhost:5000/predictint?imageName=numba9.jpg

I've got a 5 ??????????


Well, hate to admit.. There just can't be a 100% perfect model. Neither is our test datasets.

As a matter of fact; Five, does look a little bit like 9..


    Which drives us to the fact that, the model can be improved when  more and more training datasets are provided, which substantially increases the accuracy.

Key in your comments below, if you found this article to be helpful or just to give a shout-out!!!

ELK Stack... Not!!! FEK, it is.!!! Fluentd, Elasticsearch & Kibana

If you are here, you probably know what elasticsearch is and at some point, trying to get into the mix. You were searching for the keywords "logging and elasticsearch" or perhaps, "ELK"; and probably ended up here. Well, you might have to take the following section with a pinch of salt, especially the "ELK Stack"  fam.

At least from my experience, working for start-ups teaches oneself, a lot of lessons and one of the vast challenges include minimizing the resource utilization bottlenecks.
On one hand, the logging and real-time application tracking are mandatory; while on the other hand, there's a bottleneck in the allocated system resource, which is probably an EC2 instance with 4Gigs of RAM.

ELK Stack 101:

Diving in, ELK => Elasticsearch, Logstash, and Kibana. Hmm, That doesn't add up; don't you think? Elasticsearch stores the reformed log inputs, Logstash chops up the textual logs and transforms them to facilitate query, derivation of meaningful context, thereby, aiding as an input source to be visualized in Kibana.
Logstash uses grok patterns to chop up the log, doesn't it? So, an essential amount of time needs to be invested in learning how these patterns are different from that of traditional regular expressions.
But... But, who's gonna ship the logs from the application to Logstash and this shipping needs to be seem-less. Well, There's filebeat provided by elastic co, to ship all those.

So, Is it supposed to be ELFK or perhaps, FLEK stack? (WT*) 
You, be the judge!

Using four applications, singing to each other, what could go wrong?

WARNING: The following infographic may contain horrifying CPU spikes, that some readers might find disturbing.


Well.. Well.. Well.. What do we have here?

Extracting valuable information from logs is more like an excavation, digging deep to excavate the hidden treasures. It can't be at the cost of resource utilization.

Introducing, the FEK Stack.

Enter Fluentd AKA td-agent, an open-source data collection tool written in Ruby (not JAVA!!! Ruby - 1 Java - 0).


The setup is way too easy, that you can be up and running in no time.


Locate to /etc/td-agent/ and replace the existing configuration template (td-agent.conf) with the following configuration.


The parameters are self-explanatory and the keyword: format is where the regex for log chopping is given. An important thing to note is the tag keyword. The value described here should be used in the <match> segment. This bonding between the source and the mapping happens with the aid of this keyword.

For demonstration purposes, you can use the following snippet of code for random log file generation.

https://github.com/datawrangl3r/logGenerator

The configuration file is synced with this code; it shouldn't be a hassle.

Thanks for reading.
Let me know how it all worked out in the comments below!

Featured Posts

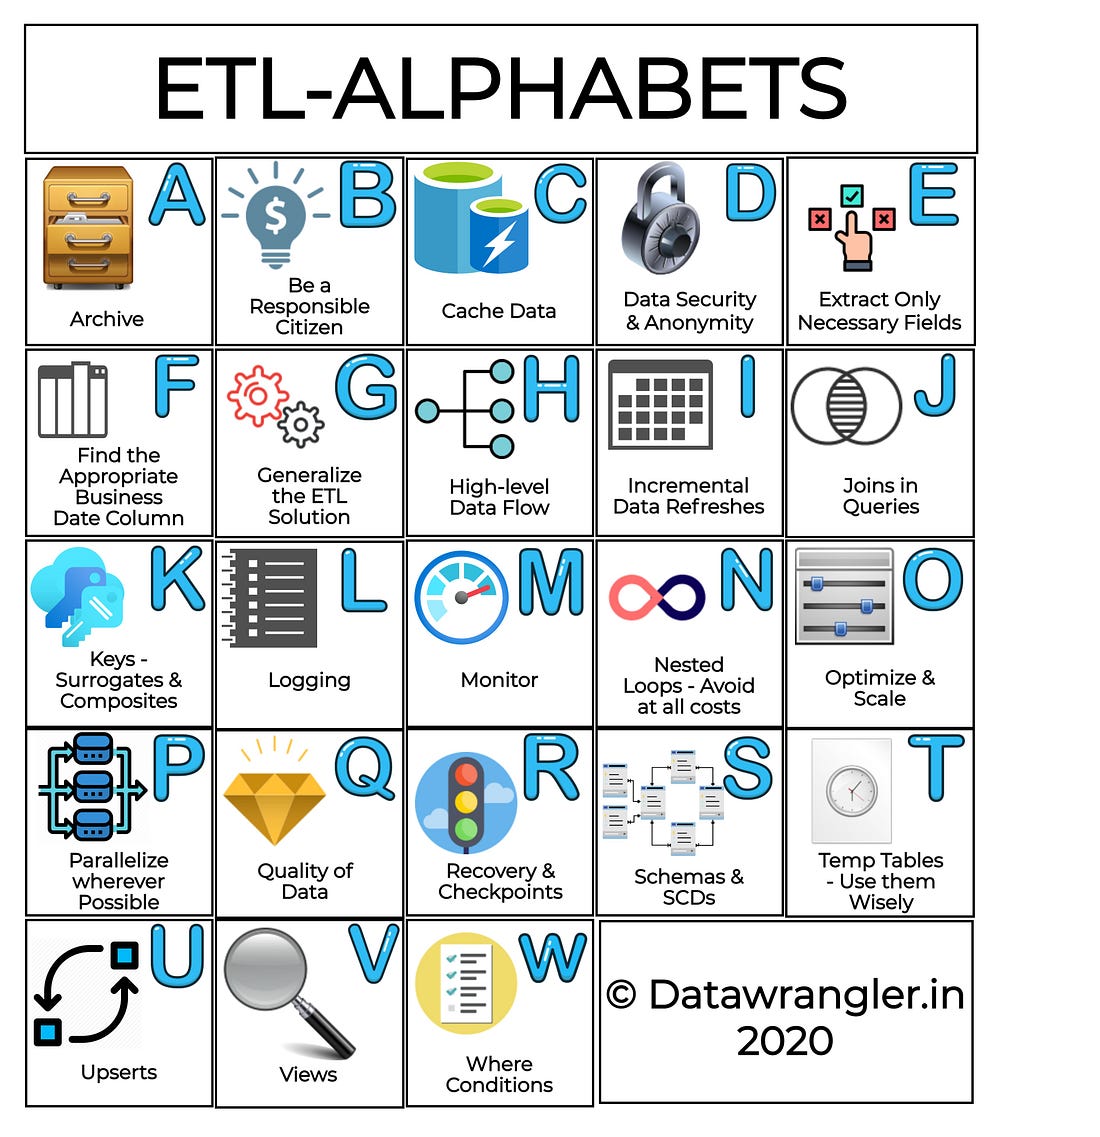
ETL & Enterprise Level Practices

  ETL Strategies & Pipelines have now become inevitable for cloud business needs. There are several ETL tools in the market ranging fro...